
Getting started with Studio
Studio is Plot Party's agentic workbench for long-form drama: brief the agent, keep every script, still, clip and voice line as a file, and step in with the tools whenever you want to drive. This guide walks through your first session.
Studio is Plot Party's agentic workbench for long-form work: a series, a full episode, a drama of thirty minutes or more. You brief an agent, it writes, casts, generates and files every result into a folder tree, and you step in with the same tools whenever you would rather drive a step yourself. This guide walks through a first session from creating a studio to exporting your work.
Studio is in early access. The Studio tab is visible to everyone, but creating a studio needs an account that has been granted access; otherwise you will see a note saying so. If you would like to use it, email [email protected] and tell us about your project.
1. Create a studio
You start a studio from the home page.
- In the create box under Hey director, what shall we create today?, pick the Studio tab. It carries a Beta badge.
- Describe the full drama you want to make. Your brief opens the first chat with the agent, and its first line becomes the studio's name.
- Click Attach files to bring material with you: scripts, references, video, audio or a .zip asset pack, up to 20 files. Anything you attach lands in the file tree and goes along with the brief as context. A zip unpacks into folders.
- Click Create Studio. If you attached files, the button shows the upload progress first. The studio then opens with the agent already at work on your brief.
Both the brief and the files are optional. An empty studio works too: leave the box blank and click Open Studio. You can always add material later with Import zip or Upload files from inside the studio.
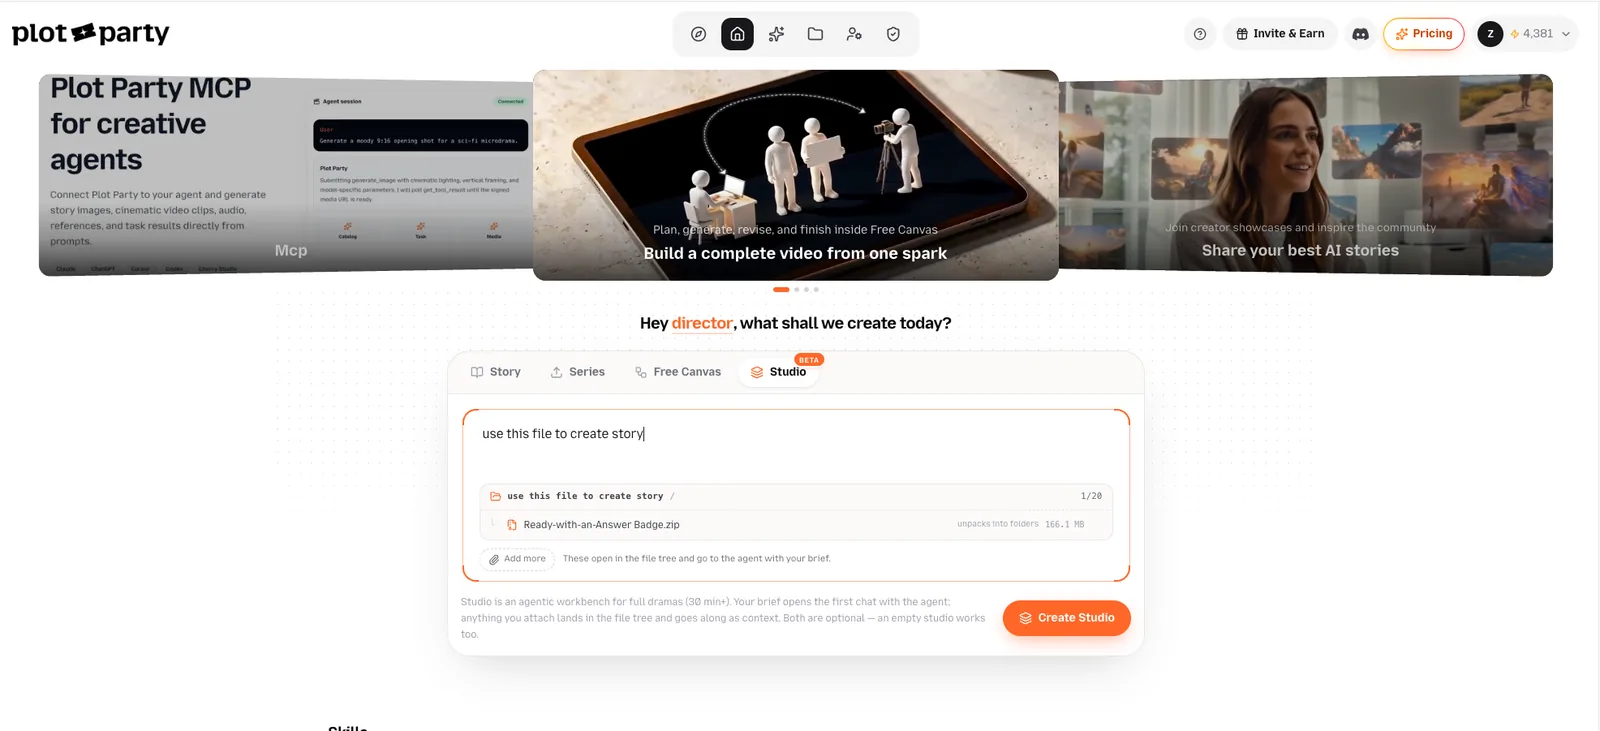
The Studio tab on the home page. Type your brief, attach a zip or loose files, and click Create Studio.
Every studio you own is listed on your Works page under the Studio tab. That is where you come back to it later.
2. Get to know the workbench
A studio is laid out like a code editor, in three columns:
- File tree on the left. Every script, still, clip and voice line is a file here, whether the agent made it or you uploaded it.
- Stage in the middle. Files, folders and tools open as tabs.
- Agent panel on the right. Your chats with the agent live here. Collapse it when you want the stage to yourself.
The header carries the studio's name (click it to rename), Share with organization members, Cast, Project memory and a question-mark button that replays the Studio tour, a five-stop walk over these regions. The tour also runs on its own the first time you open a studio.
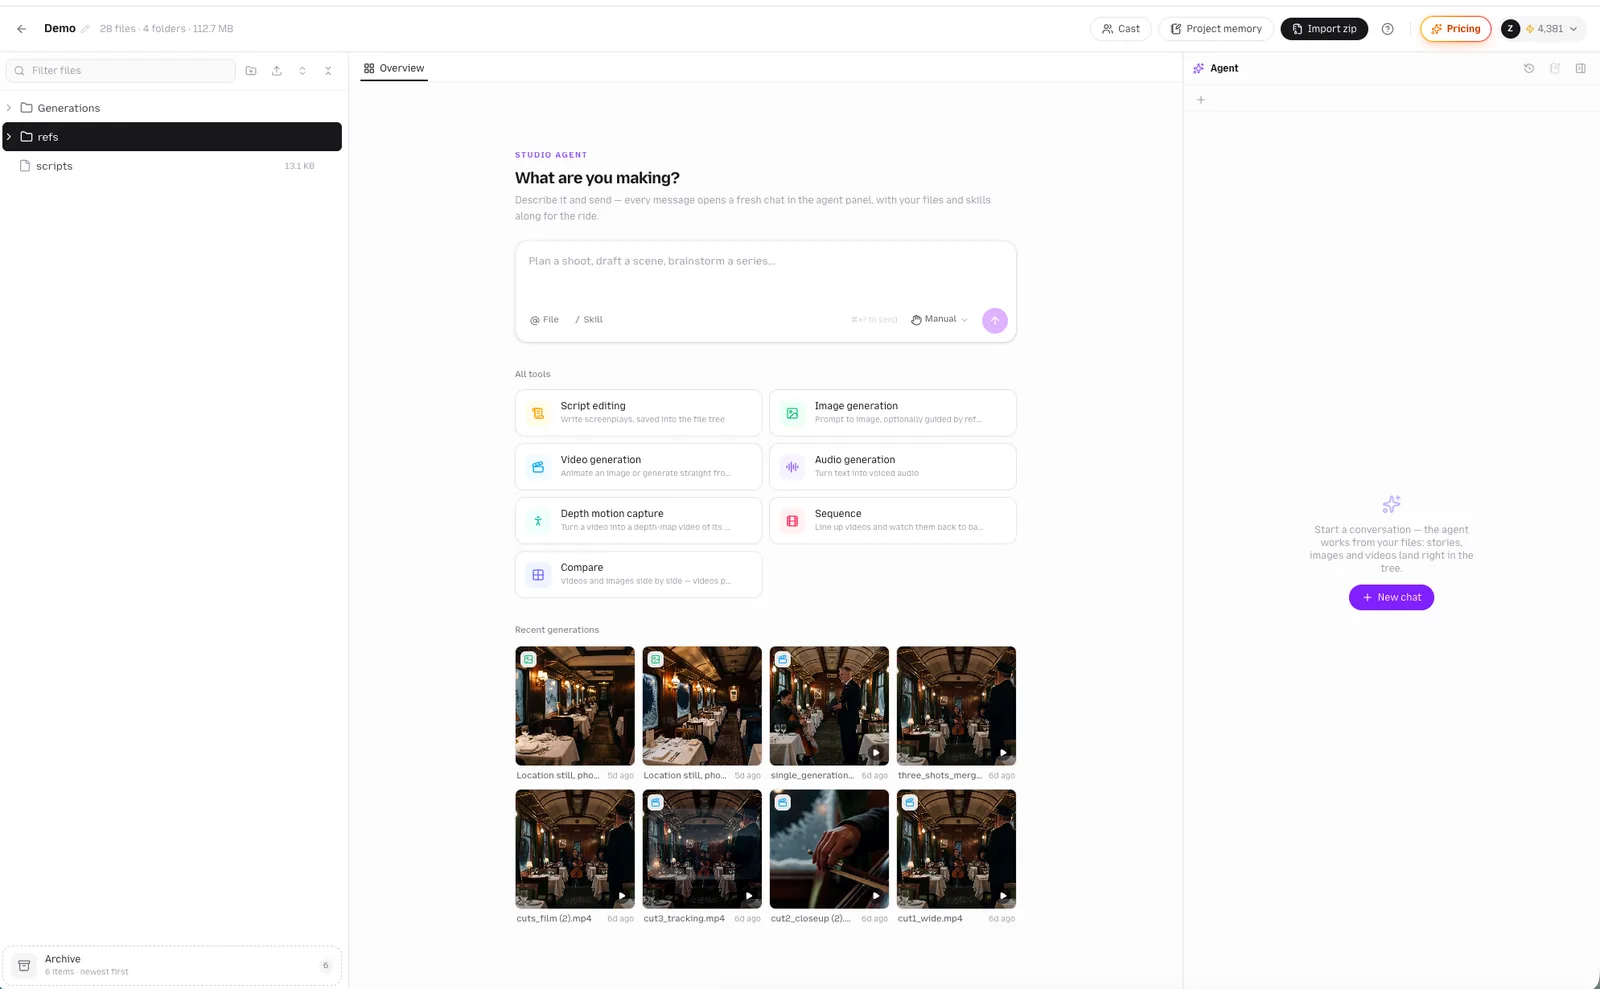
The three columns of the workbench. The header holds the studio name, Share, Cast, Project memory and the tour button.
3. Brief the agent
Start in the chat box at the top of the Overview tab, or click New chat in the agent panel. Say what you are making: a series, an episode, a single scene. Every message sent from the Overview opens a fresh chat in the agent panel. The agent plans, writes, casts and generates, and everything it produces lands in the tree as files you can open, reuse or correct.
Give it material
- Type @ to reference a file or folder from the tree. Mentioned files take priority over everything else the agent might pick.
- Drag a file from the tree onto the chat to attach it, or right-click a file and choose Attach to agent chat.
- Bind a chat to a folder from the scope bar above the composer. Every request in that chat then works from that folder's material until you click Unbind.
- Type / to bind a skill to the chat. A skill shapes how the agent approaches the work; a bound skill shows as a chip you can remove at any time.
Manual or Auto
The mode menu next to the send button sets how much the agent asks before acting. The choice applies from your next message.
- Manual (default): the agent checks with you before each stage and before every video cost. You decide step by step.
- Auto: Series Autopilot. Answer one kickoff card and the whole run completes hands-off in the background. You can keep working in the studio while it runs.
Each chat also has a Chat memory (the notebook icon) with what you asked for in that chat, its progress and next step. Closed chats stay readable under History.
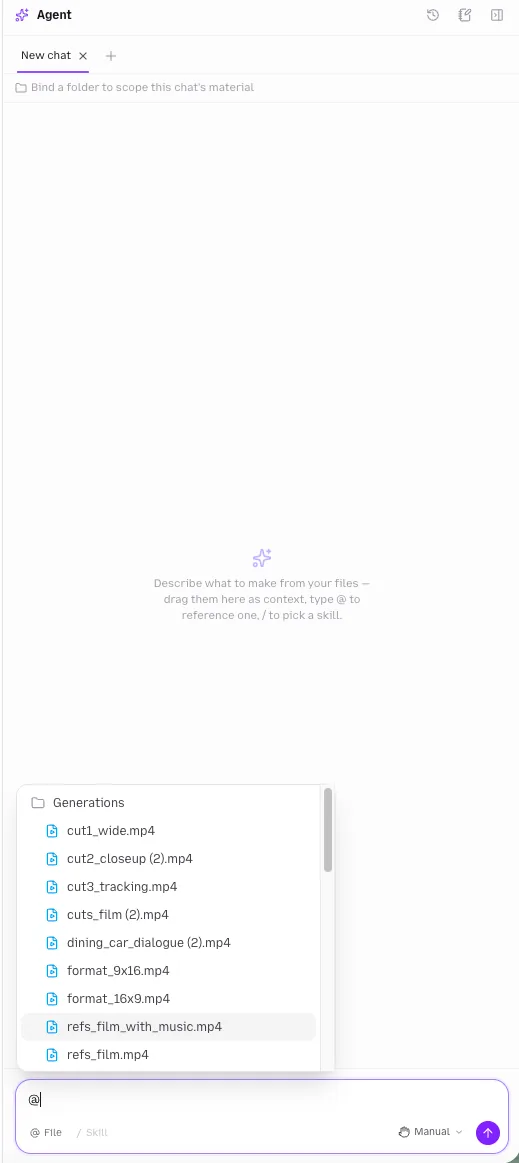
Type @ to reference a file, / to bind a skill, and pick Manual or Auto from the mode menu.
4. Everything is a file
The tree is the studio's single source of truth. Click a file to open it in a tab. Use the Filter files box above the tree to narrow it down, and the buttons beside it to create a folder, upload files, or expand and collapse everything. The agent's generations land in a Generations folder unless you asked for somewhere else; a file you regenerate lands beside the original, and the old version moves to the Archive card at the foot of the tree on its own.
Right-click a file or folder for its menu:
- New folder, Upload files, Download, Duplicate, Rename.
- Mark up on an image opens a drawing sheet to sketch and label over the picture. The result is saved as a copy beside the original.
- Reuse setup on a generated file reopens the exact composer that made it, prompt and settings included, so you can tweak and regenerate.
- Use in… sends the file into a tool: an image as a reference for image generation or as the first frame of a video, a video as a reference video or as the source for depth motion capture, and any image or video onto the Compare stage.
- Send to editor puts video, images or audio onto the timeline of the video editor.
- Attach to agent chat adds the file as context for your current chat.
- Archive moves a file out of the way without deleting it. You can also drag a file onto the Archive card. Archived files can be restored; Delete removes them for good.
Select several files (Shift-click or Cmd/Ctrl-click) to act on them together: Download as zip, Compare side by side, send them all to the editor, or archive them in one go.
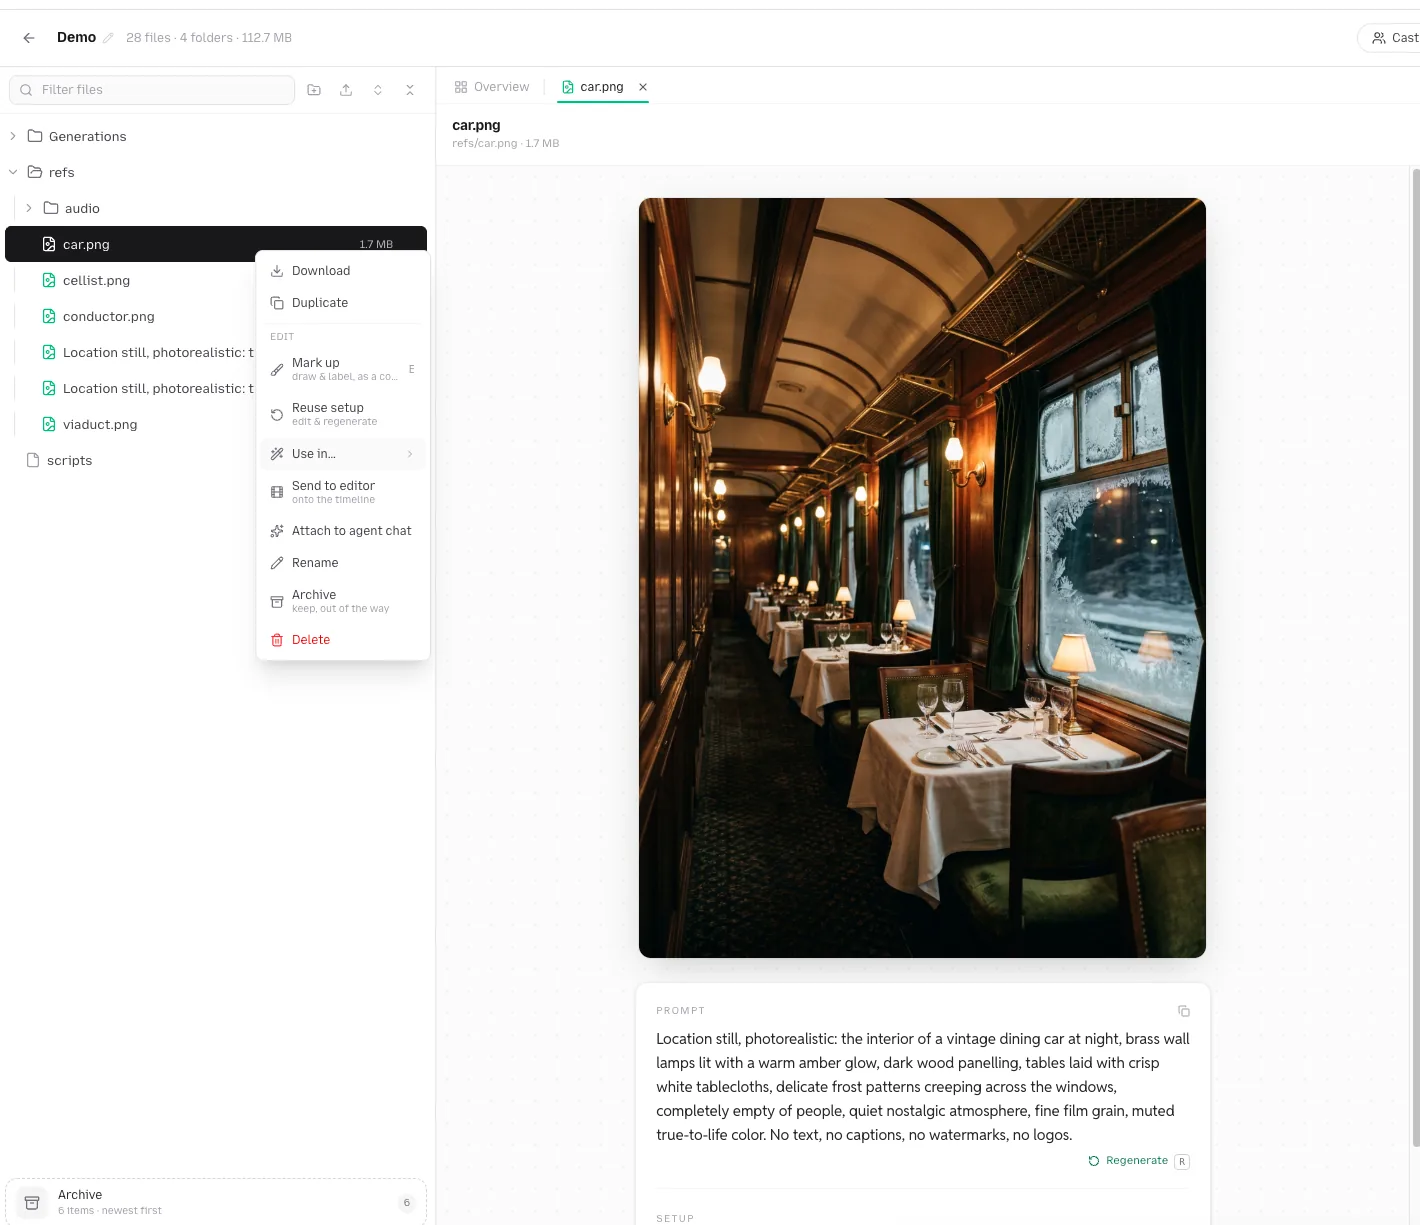
Right-click any file for Mark up, Reuse setup, Use in…, Send to editor, Attach to agent chat and more.
5. Work on the stage
- Tabs behave like a code editor's. Right-click a tab to close others, close to the right or close all, and pin a tab to keep it open through Close all.
- Drag a tab to the right edge of the stage to open a second pane. A script on one side and the stills it describes on the other is the classic setup.
- A file tab shows the file with a tool rail at its right edge: the file's tools, where it can be sent, then Download and Fullscreen. Each button carries its one-key shortcut, for example D to download, F for fullscreen, E to mark up an image and R to reuse a generated file's setup.
- Fullscreen opens Quick Look: step through the folder's files with the arrow keys, press I for the file's details, and Esc to close.
- A generated file also carries its provenance: the prompt, the model and settings, and the references it was made from, with Copy prompt and Regenerate at hand.
- A folder tab shows the folder as a gallery. Filter by Images, Videos, Audio or Files, and turn on Subfolders to see a whole branch at once.
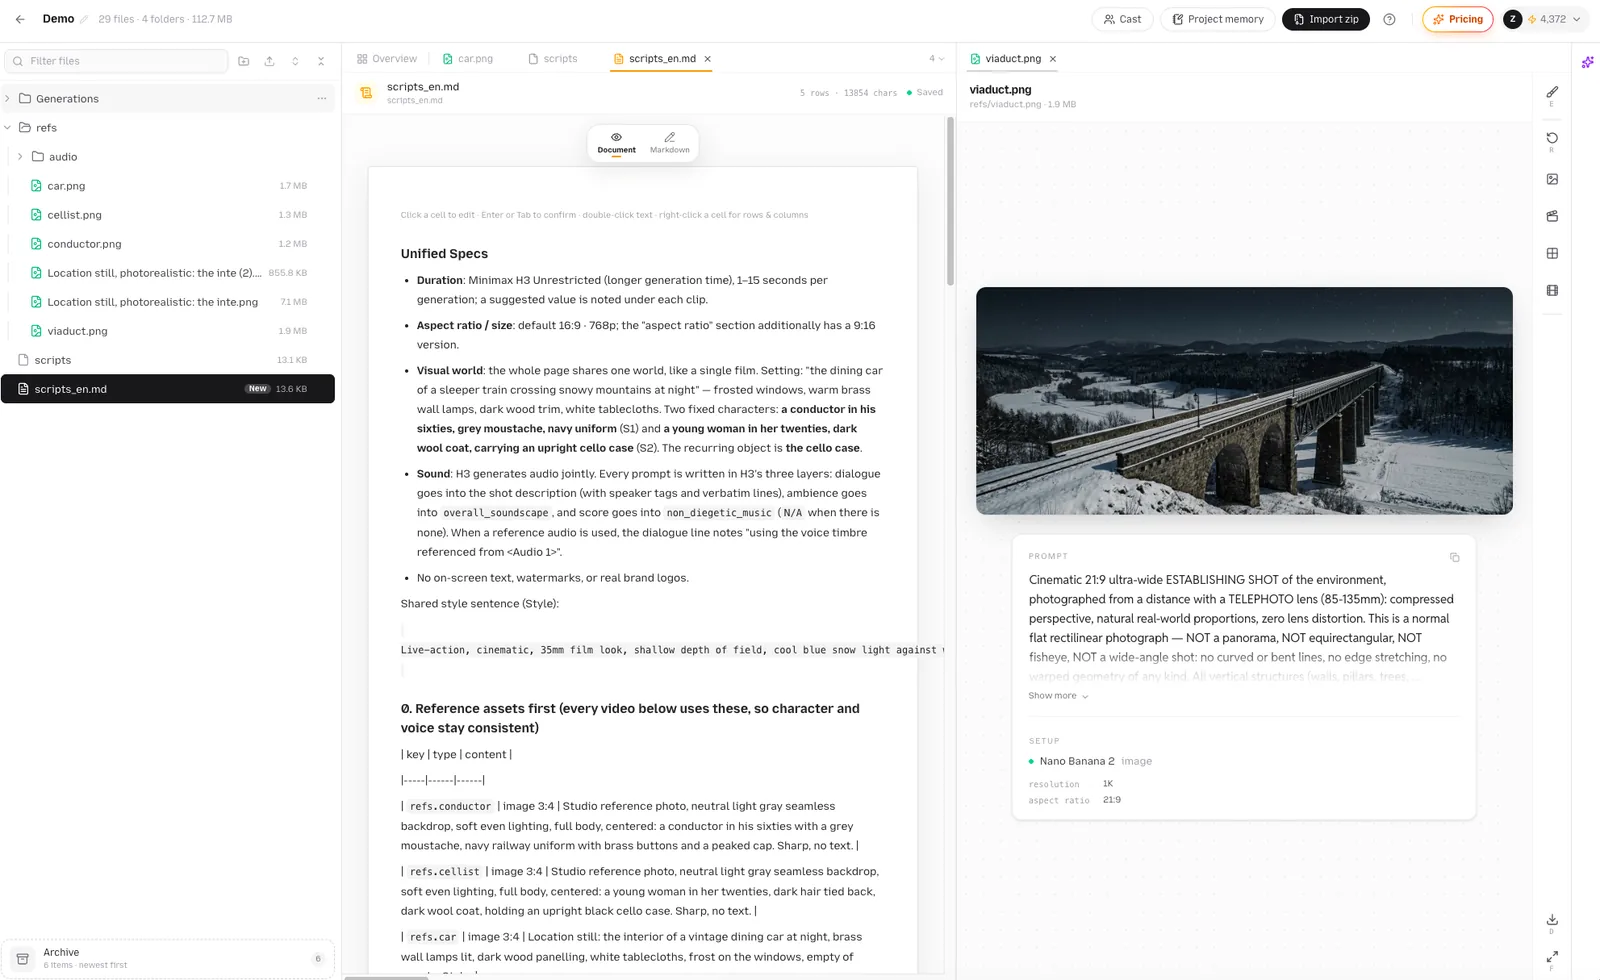
Drag a tab to the right edge of the stage to open a second pane.
6. Do a step yourself: the tools
The Overview tab is always open. It asks What are you making? above the chat box, lists All tools below it, and ends with Recent generations, a wall of your latest results. Each tool opens as a tab, and whatever it produces is filed into the tree like the agent's own work.
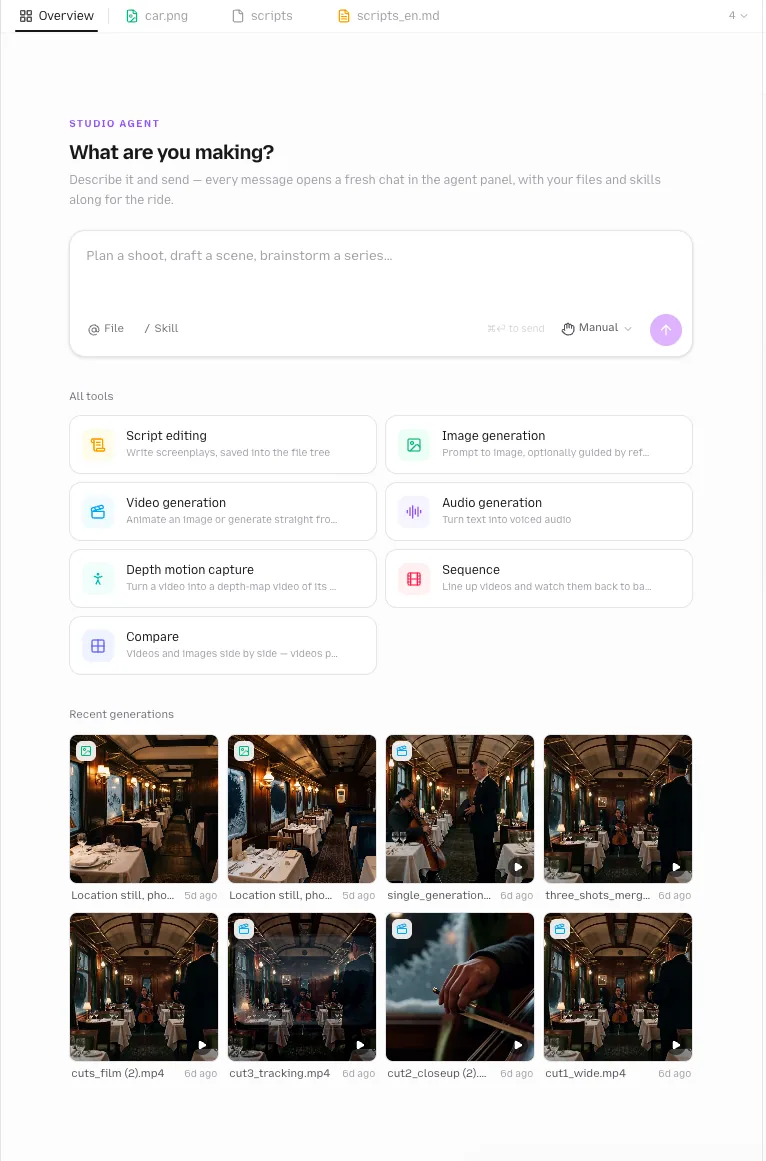
The overview tab: a chat box up top and every tool below it.
| Tool | What it does |
|---|---|
| Script editing | Write screenplays, saved into the file tree. Two views: Document for reading, with click-to-edit table cells, and Markdown for the raw source. Autoformat lets AI mark scenes, character names, dialogue and notes for 1 credit; your text is never rewritten and Undo restores the previous version. |
| Image generation | Prompt to image, optionally guided by reference images. |
| Video generation | Animate an image or generate straight from text. Models with first and last frame slots show the two slots with an arrow between them. |
| Audio generation | Turn text into voiced audio. Pick a voice and language, or generate music with the music models. |
| Depth motion capture | Turn a video into a depth-map video of its motion, ready to drive a character. |
| Sequence | Line up videos from the tree and watch them back to back as one cut. |
| Compare | Videos and images side by side. Videos play in sync, with layout, position and playback speed controls. |
Using a generation composer
- Choose a model from the selector. The lineup is the same as the Generate page. Models above your plan carry a PRO or Platinum lock, and models marked Coming Soon are listed but disabled. A model option Studio does not support yet is named under More parameters, with a pointer to the Generate page.
- Fill the reference slots: drag a file from the tree onto a slot, or click the slot to browse the studio's assets. First-frame, last-frame and reference slots depend on the model.
- Write the prompt. Mention a reference with @ to tell the model which image you mean.
- Set the model's options in the footer chips (aspect ratio, duration, resolution and so on). Less common switches and sliders sit under More parameters.
- Check the cost. The Generate button shows the exact number of credits before you click, and updates as you change the model, duration or resolution. Discounted models show the regular price crossed out.
- Click Generate. Results land in the file tree: the run appears there straight away as a developing file, and a status line under the composer counts what is in flight. If your balance is too low, the plan dialog opens instead and nothing is charged. Failed runs are refunded automatically; see refunds for failed generations.
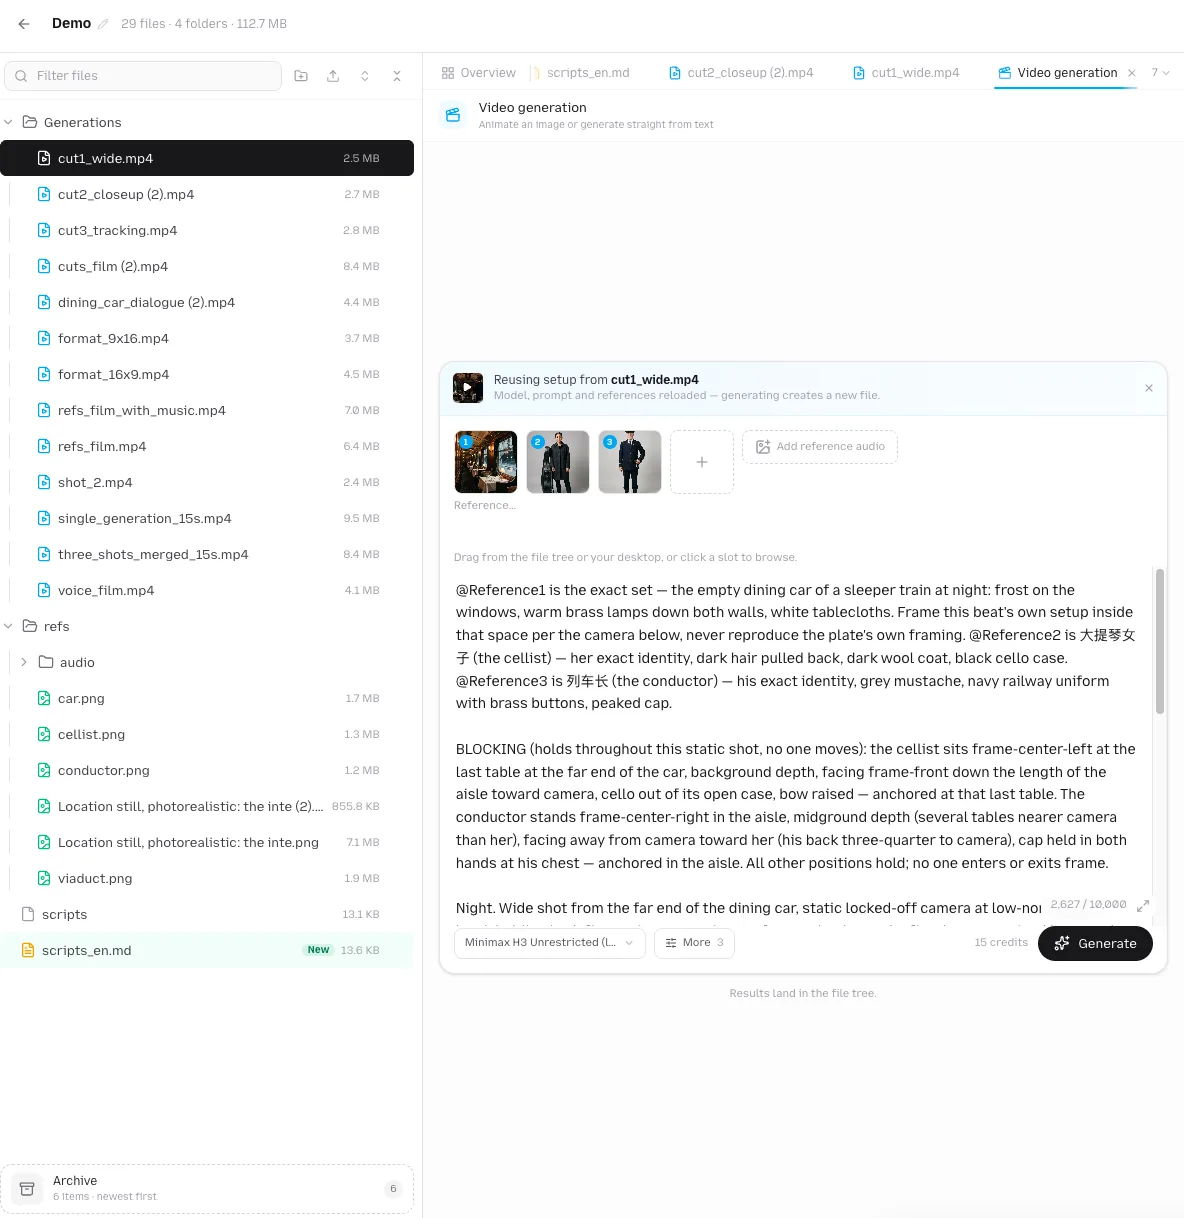
A generation composer. Reference slots fill from the tree, footer chips hold the model's options, and the Generate button shows the exact cost.
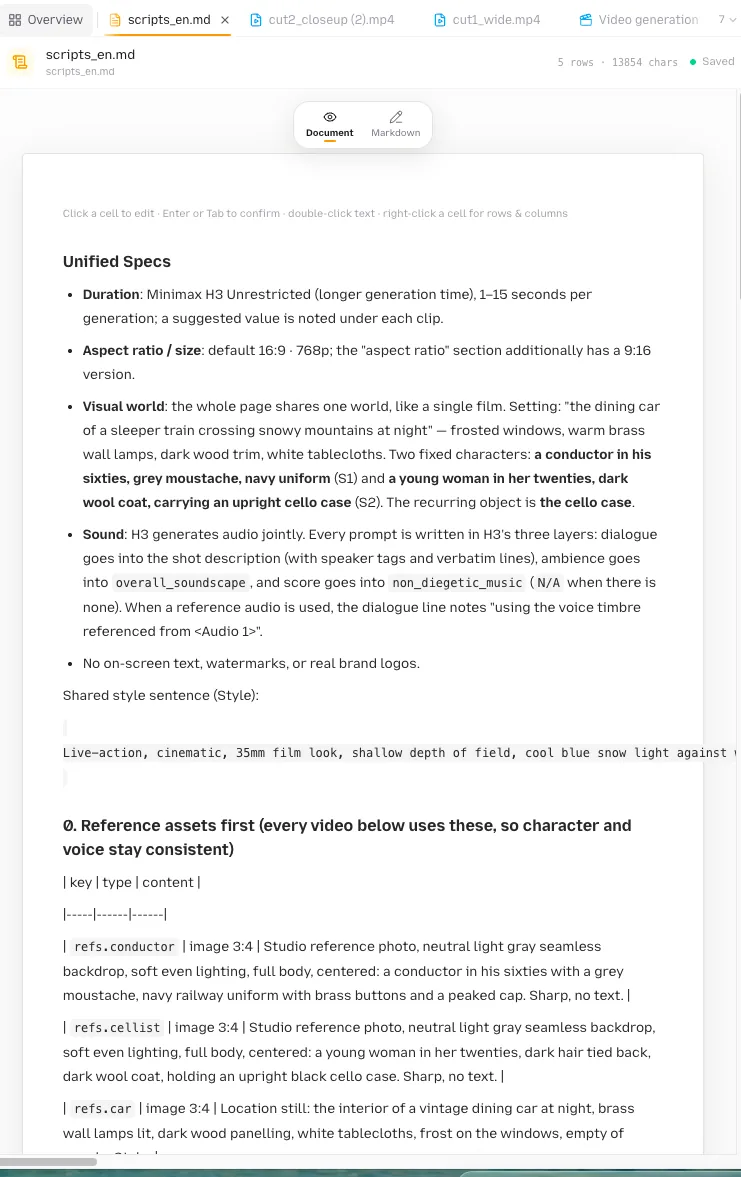
Script editing: Document view for reading and cell-by-cell edits, Markdown view for the raw source.
7. Keep the project's memory straight
Two things make a long project hold together across many chats:
- Project memory is the notebook every agent chat in this studio shares: style, cast and looks, locations, conventions, locked decisions, episode status. It is plain markdown in ## SECTION blocks. Open it from the header, read it, correct anything that drifted, and press Cmd/Ctrl-S to save. The agent sees your edit on its next turn. While an agent is mid-turn in a chat, the memory is read-only for a moment.
- Cast lists every character the agent knows, read straight off their character files: identity, the voice every clip prompt quotes, and one look sheet per look with the episodes it serves. Click a sheet to open it. Cast is read-only here; the agent sets a profile when it generates a character card or files a photo you upload.
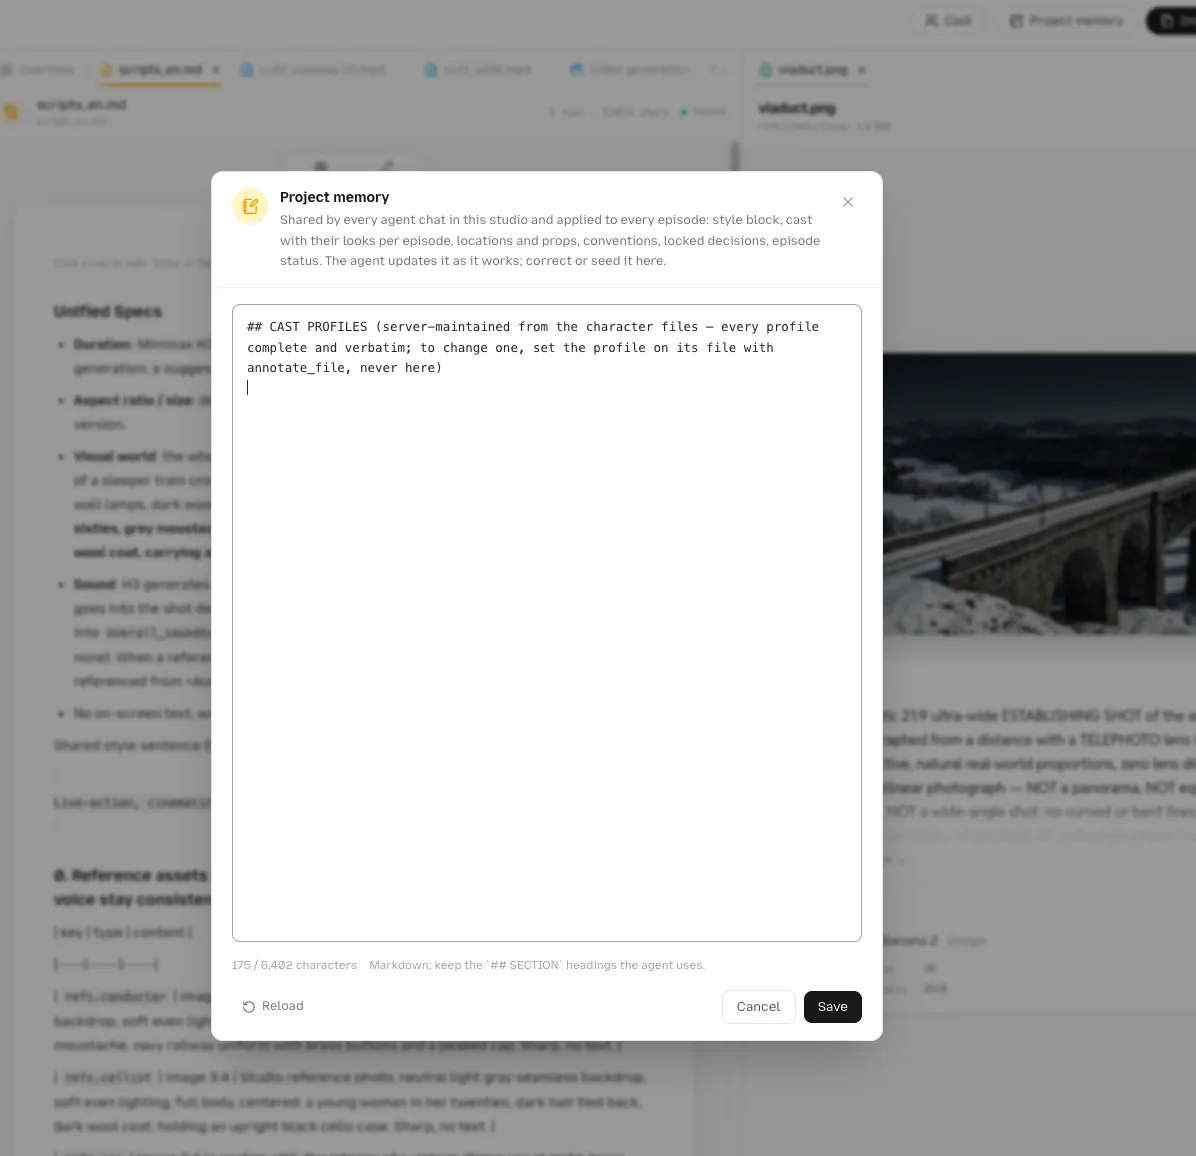
Project memory is the notebook every chat in the studio shares. Correct it here and the agent sees the edit on its next turn.
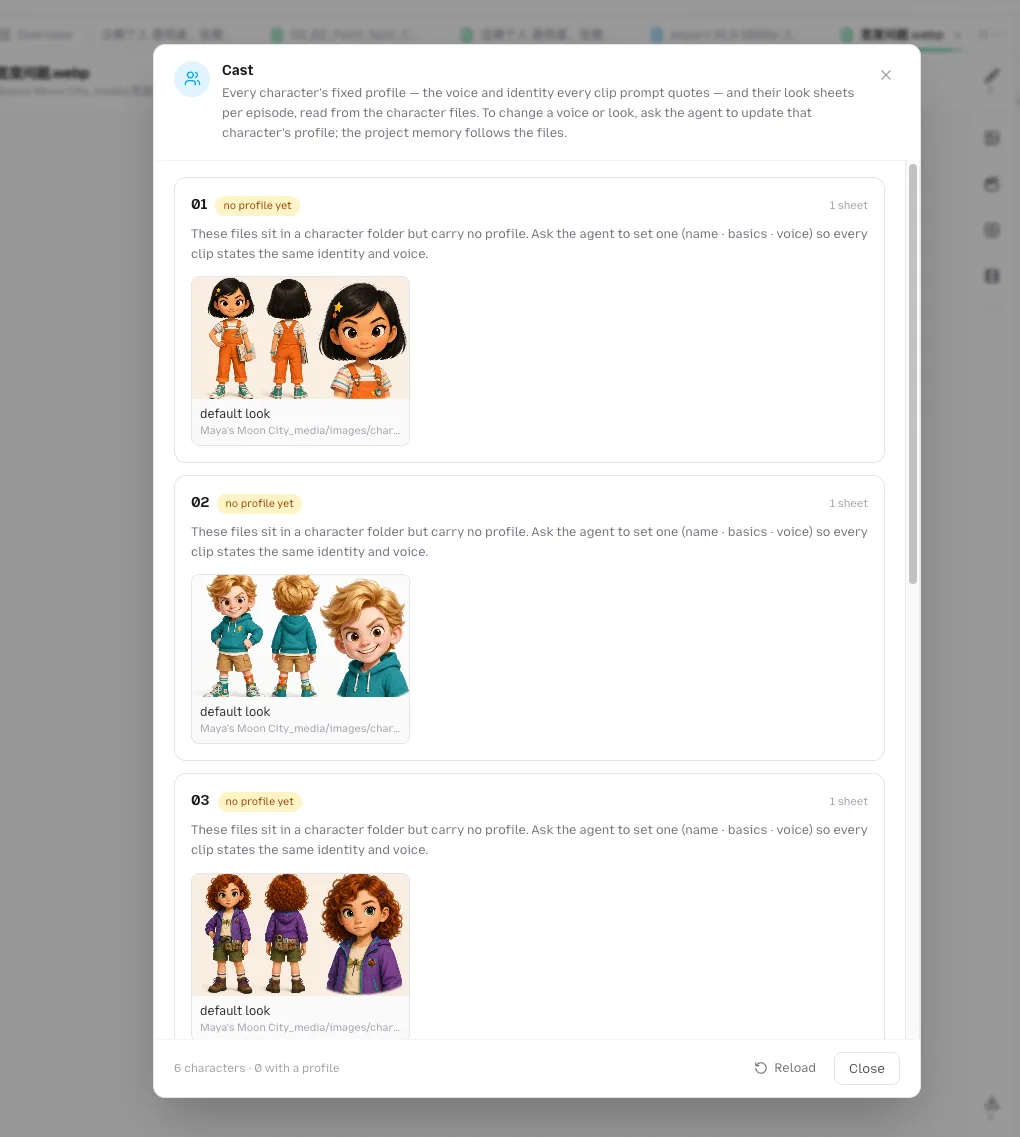
Cast reads every character off their files: profile, voice and one look sheet per look.
8. Share and export
- Share with organization members in the header lets teammates in your organization open the studio and work in it with you.
- Select files or folders and choose Download as zip to take a whole branch with you. A single file downloads with D or from its menu.
- Send to editor hands clips, stills and audio to the video editor's timeline for the final cut.
Credits
Every generation the agent runs, and every one you run yourself, is paid in Plot Points at the model's normal rate. In Manual mode the agent asks before every video cost; in Auto mode the kickoff card sets the plan and the run spends as it goes. See what Plot Points are and how they are spent.